
Feb 21, 2024
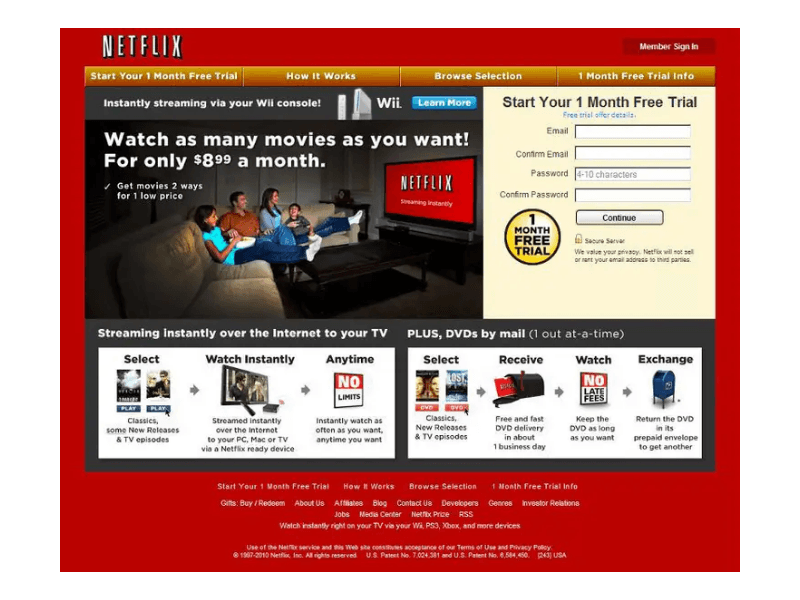
It goes without saying, that websites are evolving faster than we could ever imagine. Not quite sure what we mean? Here’s a snapshot of Netflix in 2011 vs. current one:

Websites are no longer slow to load, uninteresting and just there to prove an online presence. They are now interactive, immersive experiences. A lot goes on behind-the-scenes to make the websites of yesterday, web apps of today. In this article, we at Team Codesign take you through our process of designing web apps.
Step 1: Discovery
As the name suggests, the first step in designing a web app is to discover everything you can about it. This involves answering questions such as the purpose of the app, the stakeholders involved, the intended target audience, their geolocations, demographics, etc.
The process of discovery is extremely crucial to the success of the project. It helps all stakeholders understand the product better. It also aligns everyone onto the same page. And importantly it helps our designers avoid any roadblocks of the past. To get the most out of the discovery phase, we at Team Codesign actually analyse the best way to gather our information. Sometimes that involves individual interviews with key people; while at other times we hold multiple brainstorming workshops with all the stakeholders involved.
Step 2: Planning
With the basic research in place, we now move to the planning stage. Here we put down on paper, outlines of how the app will work and how the end-user will eventually interact with it.
To structure & organize the information gained in the discovery phase we create what is called an Information Architecture (IA). Through IA, we categorize the content and find ways to help the user navigate through it all.
Our planning stage also involves creating user flows. User Flows are visuals that give a step-by-step account of the users’ journey through the app. These are not created on assumptions. They are created on the basis of data & analysis. Keeping the objective of the app in mind, designers use user flows to guide users towards this objective in the simplest & most effective manner possible.
Step 3: Sketching
For some, the sketching phase may appear simplistic but there’s more to it than what meets the eye. Roughly sketching the basics of an app either on paper or on-screen helps designers communicate their ideas both quickly and clearly. Sketching gives everybody involved a starting point for a brainstorming session. Sketches also allow designers to simultaneously explore multiple ideas. Sketches may look rough but they help a great deal in refining ideas.
Step 4: Stylescapes
As we understand the brand better, we begin creating what is called a stylescape. For this, we expect to have a pre-existing set of brand guidelines, either provided by the client or created by us (if requested beforehand as part of the branding process).
A stylescape is a design tool that helps define the visual direction of a project. It uses images, colours, typography, etc. that have been edited to suit the brand. Surely, you must be wondering how a stylescape differs from a mood board or brand guidelines. We won’t get into all the details here, but we will say this; they are all worlds apart. A stylescape is extremely in-depth. It includes elements you will use in your apps such as buttons and cards. It also shows you various possibilities of what you could do with your brand.
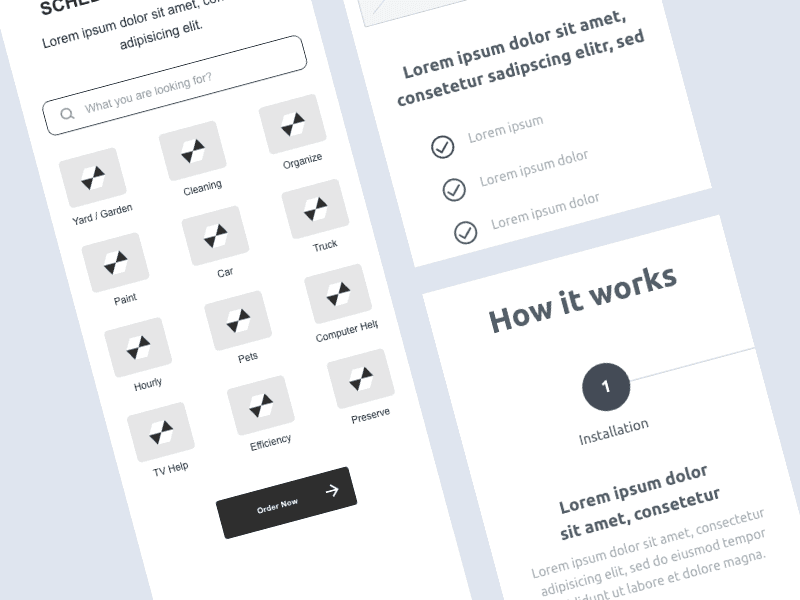
Step 5: High Fidelity Wireframing or Prototyping
A wireframe is a two-dimensional representation of the app. Fidelity refers to the amount of detail. In most cases, our high-fidelity wireframe or prototype will represent the information architecture, user flow, visual style, navigation systems, and even the actual content and images we intend on using in the final app. Here’s an example of what high fidelity wireframe looks like:
At Team Codesign we prefer to use tools such as Adobe XD or Figma to create these prototypes. The moment a client approves our prototypes; the backend developers can begin working on the logic and API side of things.
Step 6: Visual Design
Here is where the UI designer gets completely involved. UI is not just about making things look good (though that is part of the process as well). The UI designer organises elements in a way that guides the user’s eye towards an elements’ functionality. One method our UI designers use to do this is by adjusting font sizes, colours, and spacing to create a visual hierarchy.
Though the flow and logic of the end product do not change here, our visual designers make suggestions and edits to the screen structure before sharing their ideas with our frontend developers. Sharing ideas is actually a very technical process at Team Codesign.
Our UI designers create a Design Specifications document that explains in detail the reasoning and requirements from every UI element within the app. We usually create this document using Adobe XD, but sometimes we also use other online tools like Figma or Zeplin. This document is shared with both the frontend developer and the client.
Step 7: Frontend Development
Frontend development is the technical implementation of the visual design. Whatever a user sees when interacting with an app, is put together by a front-end developer. Using three main coding languages (i.e. - HTML, CSS & JavaScript) front-end developers ensure that users have a consistent experience with the app, across platforms. The frontend process begins only once the Visual Design is complete. Here too the developer uses the Design Specifications document.
Step 8: Testing
Throughout our design process, we are constantly testing our prototype manually. The final app pages are tested using a cloud-based cross-browser tool called Lambda Test. This is done only when the development team has worked their magic. Once convinced, we handover the final product to the client. And with that, our design process at Team Codesign is complete.
For us, it is an exciting process. We bounce ideas back and forth off each other (to be honest, our processes usually overlap), we communicate with each other, and we push each other to do better each time. Our stakeholders too are part of this process at every step. (Read more about this here.) You could also read a case study of a project we did in the past.
As with all good processes, it’s more about the journey than the destination. Do you like the way we do things? Drop us a line, we’d be happy to work together. Or feel free to suggest better ways we can work. After all, the design is the most fun when it’s collaborative.


" width="24px"><path d="M 0 24 L 0 0 L 24 0 L 24 24 Z" fill="transparent" height="24px" id="Wsj_xAGHa" width="24px"/><path d="M 18 0 L 6 0 C 2.7 0 0 2.7 0 6 L 0 18 C 0 21.299 2.7 24 6 24 L 18 24 C 21.299 24 23.999 21.299 23.999 18 L 23.999 6 C 23.999 2.7 21.299 0 18 0 Z M 21.999 18 C 21.999 20.205 20.206 22 18 22 L 6 22 C 3.795 22 2 20.205 2 18 L 2 6 C 2 3.794 3.795 2 6 2 L 18 2 C 20.206 2 21.999 3.794 21.999 6 Z" fill="rgb(204, 202, 192)" height="24px" id="MyIybPesa" width="23.9994px"/><path d="M 1.5 3 C 2.328 3 3 2.328 3 1.5 C 3 0.672 2.328 0 1.5 0 C 0.671 0 0 0.672 0 1.5 C 0 2.328 0.671 3 1.5 3 Z" fill="rgb(204, 202, 192)" height="2.99993px" id="vBfo_rUgb" transform="translate(17.001 4)" width="2.9999000000000002px"/><path d="M 6 0 C 2.686 0 0 2.686 0 6 C 0 9.313 2.686 12 6 12 C 9.313 12 12 9.313 12 6 C 12 2.686 9.313 0 6 0 Z M 6 10 C 3.791 10 2 8.209 2 6 C 2 3.79 3.791 2 6 2 C 8.209 2 10 3.79 10 6 C 10 8.209 8.209 10 6 10 Z" fill="rgb(204, 202, 192)" height="12.0003px" id="CMwk2okKA" transform="translate(6 6)" width="11.9997px"/></g></svg>)
" height="23.17099px" id="vqO63JQxv" transform="translate(8.236 2.929)" width="12.498969999999998px"/></svg>)
" width="24.000299719848634px"><path d="M 0 24 L 0 0 L 24 0 L 24 24 Z" fill="transparent" height="24px" id="Mzy6fD77D" width="24px"/><path d="M 15.505 16.426 L 15.511 16.425 L 15.511 7.623 C 15.511 3.317 14.584 0 9.55 0 C 7.13 0 5.506 1.328 4.843 2.587 L 4.773 2.587 L 4.773 0.402 L 0 0.402 L 0 16.425 L 4.97 16.425 L 4.97 8.491 C 4.97 6.402 5.366 4.382 7.953 4.382 C 10.502 4.382 10.54 6.766 10.54 8.625 L 10.54 16.426 Z" fill="rgb(204, 202, 192)" height="16.42598px" id="HYQJ2gsFP" transform="translate(8.489 7.574)" width="15.51104px"/><path d="M 0 0 L 4.976 0 L 4.976 16.023 L 0 16.023 Z" fill="rgb(204, 202, 192)" height="16.02304px" id="ViNoCHdVu" transform="translate(0.396 7.977)" width="4.976006px"/><path d="M 2.882 0 C 1.291 0 0 1.291 0 2.882 C 0 4.473 1.291 5.791 2.882 5.791 C 4.473 5.791 5.764 4.473 5.764 2.882 C 5.763 1.291 4.472 0 2.882 0 Z" fill="rgb(204, 202, 192)" height="5.791px" id="sBXUIOzkZ" width="5.764px"/></g></svg>)
" width="22px"><path d="M 0 22 L 0 0 L 22 0 L 22 22 Z" fill="transparent" height="22px" id="w6uWR0FhG" width="22px"/><path d="M 12.811 9.316 L 20.825 0 L 18.926 0 L 11.968 8.089 L 6.41 0 L 0 0 L 8.404 12.231 L 0 22 L 1.899 22 L 9.247 13.458 L 15.117 22 L 21.527 22 L 12.811 9.316 Z M 10.21 12.339 L 9.359 11.121 L 2.583 1.43 L 5.5 1.43 L 10.968 9.251 L 11.82 10.469 L 18.927 20.635 L 16.01 20.635 L 10.21 12.34 Z" fill="rgb(204, 202, 192)" height="22px" id="achXGnXXP" transform="translate(0.236 0)" width="21.526972px"/></g></svg>)
" height="23.31396px" id="VUTAjGkst" transform="translate(0 1.186)" width="17.8283px"/><path d="M 0 0 L 7.595 0 C 12.489 0 16.457 3.82 16.457 8.533 C 16.457 13.246 12.489 17.067 7.595 17.067 L 5.064 17.067 L 5.064 21.943 L 0 21.943 Z M 5.064 12.19 L 7.595 12.19 C 9.693 12.19 11.393 10.553 11.393 8.533 C 11.393 6.513 9.693 4.876 7.595 4.876 L 5.064 4.876 Z" fill="rgb(204, 202, 192)" height="21.9426px" id="KJ3s5dgYH" transform="translate(2.057 0.5)" width="16.456960000000002px"/></svg>)